Core Diagnostic Process for Shredder Electrical Control Systems
Lockout-Tagout & Energy Verification
Data Collection & Fault Code Review
Targeted Measurement & Verification
Component Replacement & Testing
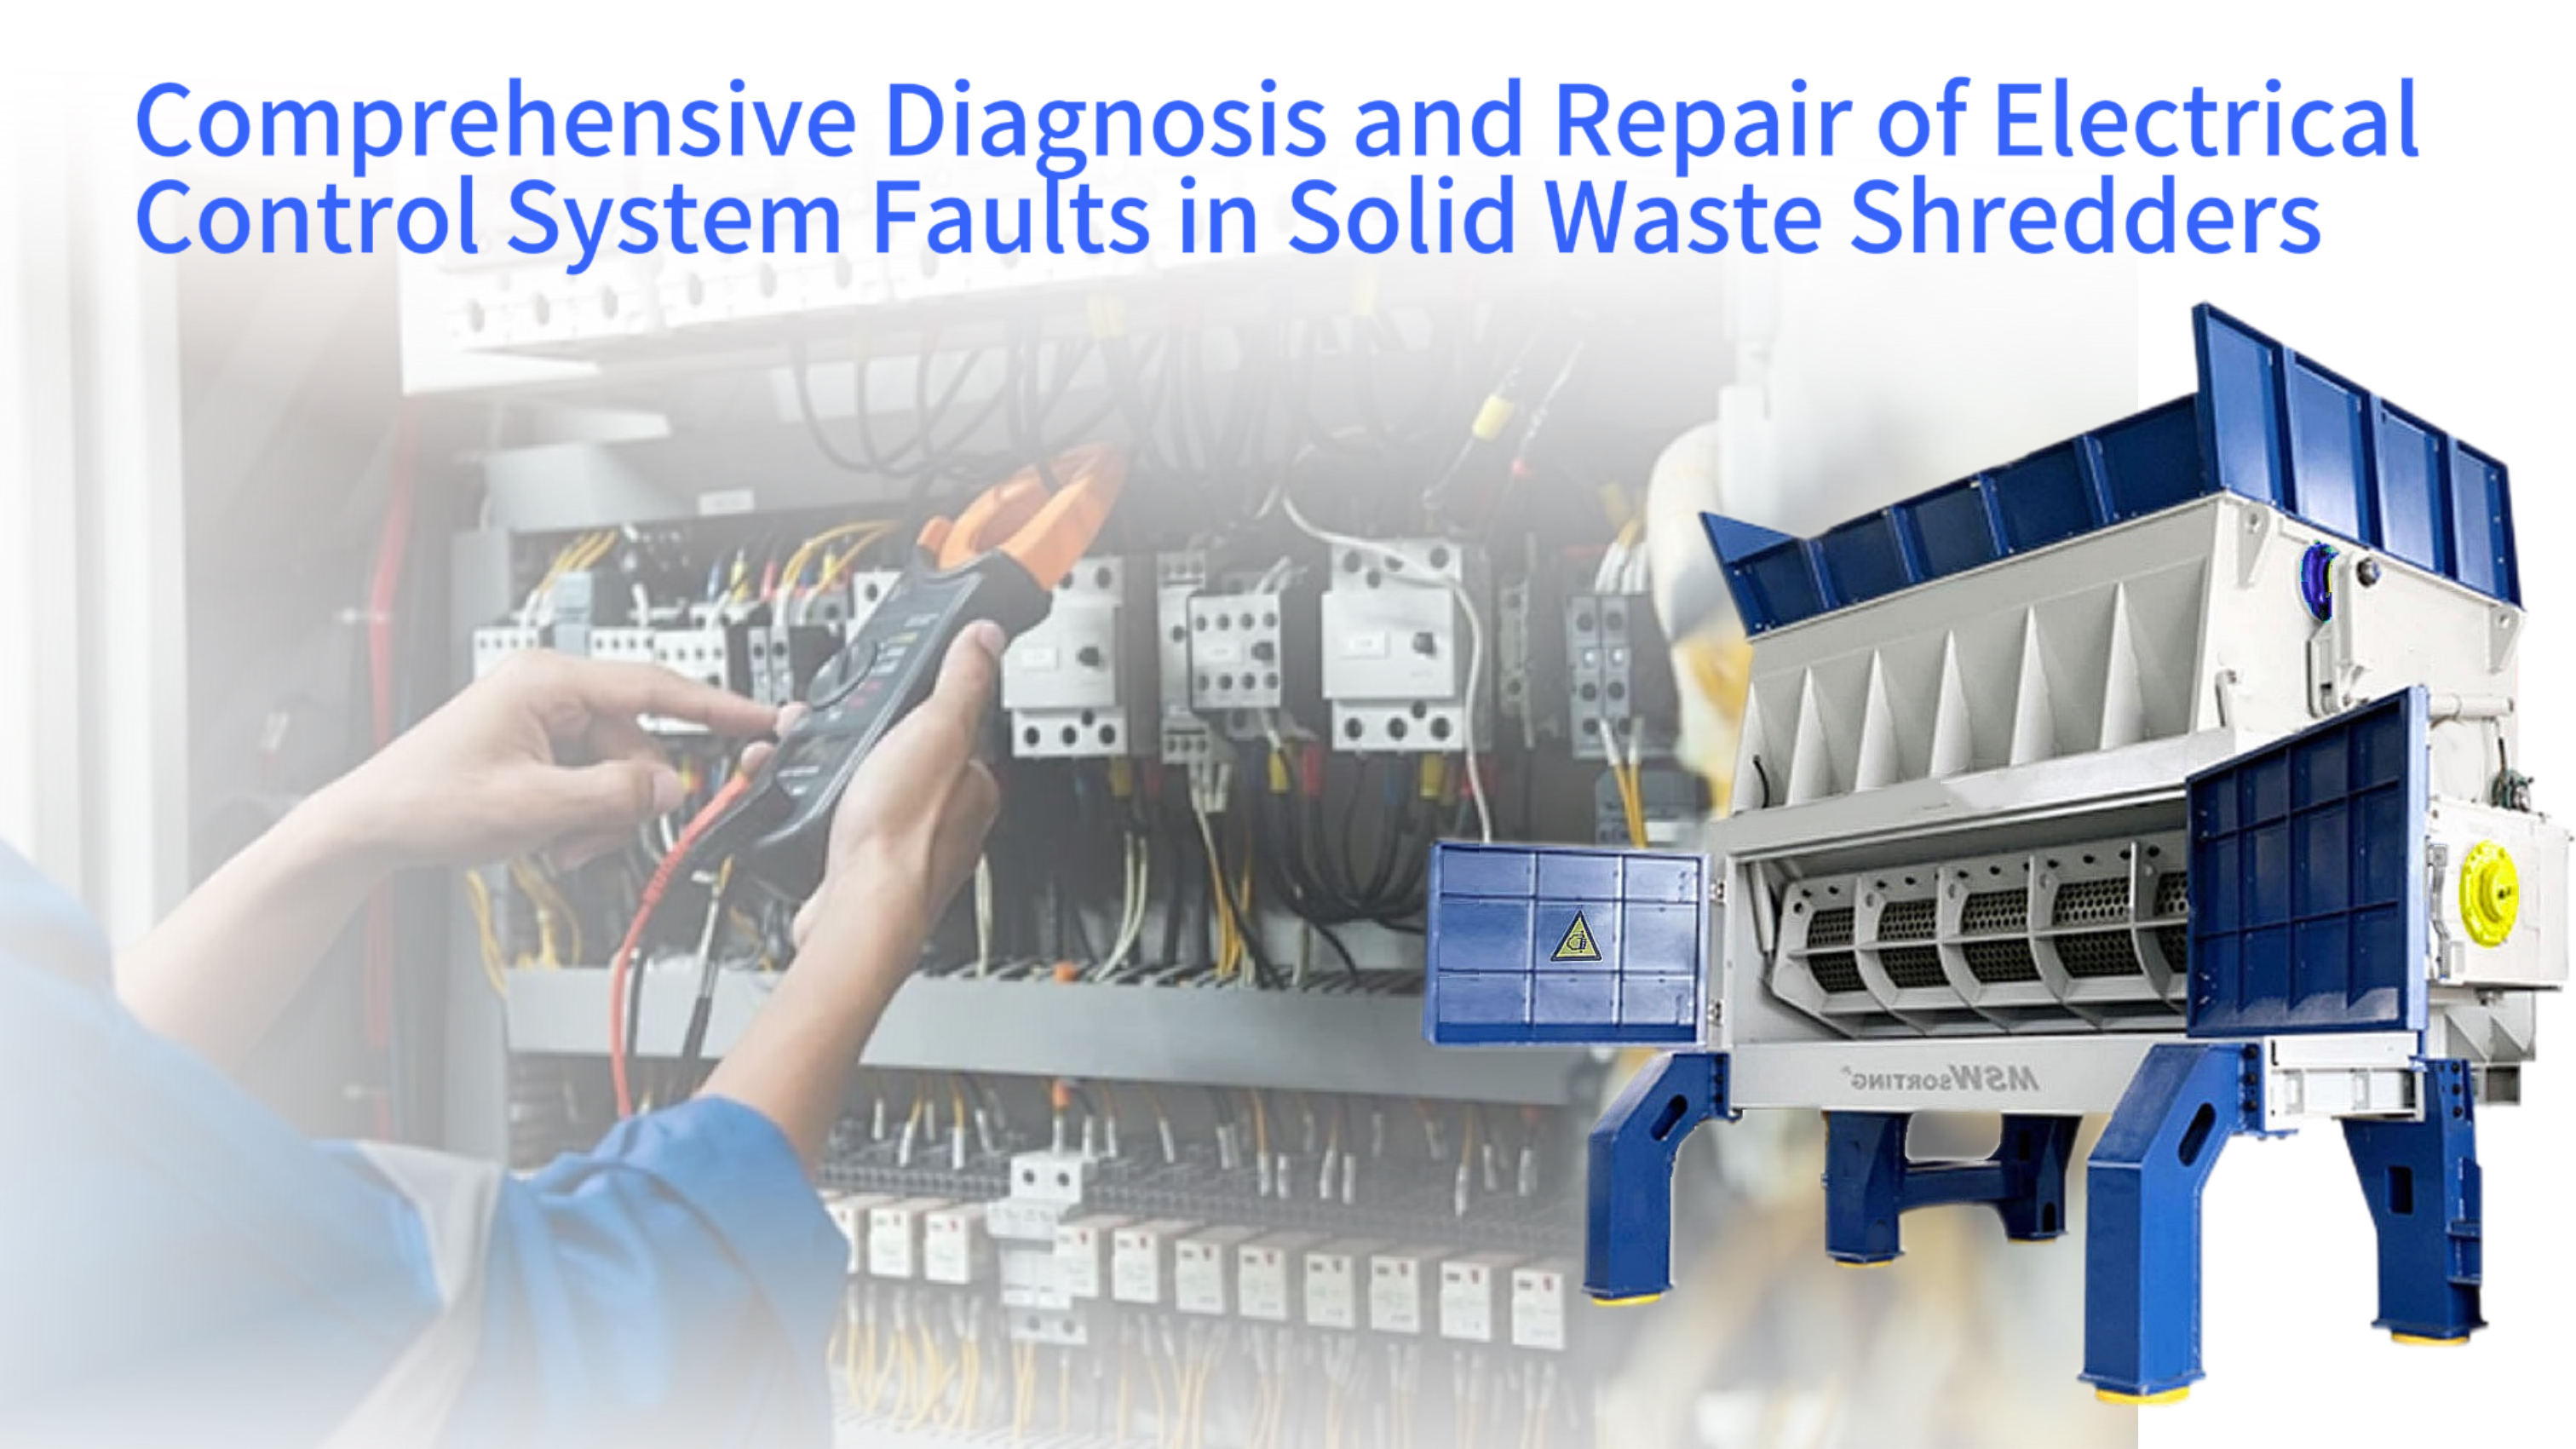
The reliable operation of a solid waste shredder is fundamentally dependent on the integrity of its electrical control system. This sophisticated network of components serves as the operational nexus, translating operator commands into mechanical action while ensuring safety and monitoring performance. A systematic approach to diagnosing faults within this system is essential for minimizing costly downtime in recycling and waste processing facilities. This guide provides a detailed framework for troubleshooting electrical issues, from initial symptom assessment to the execution of verified repairs and the implementation of preventive strategies. Mastery of these procedures empowers maintenance personnel to restore functionality efficiently, thereby safeguarding productivity and extending the operational lifespan of critical shredding assets, a principle demonstrated through fifteen years of application engineering by specialists at MSW Technology.
Fundamental Architecture of a Shredder's Electrical Control System
Electrical Control System Architecture
Central Processing Unit
Programmable Logic Controller (PLC) - Core logic processing
Variable Frequency Drives (VFD) - Motor speed/torque control
Control Panel HMI - Operator interface & communication
Power Distribution & Actuation
Main Circuit Breakers - Overcurrent protection
Contactors & Relays - Power switching for motors/auxiliaries
Thermal Overload Protectors - Motor winding protection
Input Devices
Temperature/Vibration Sensors - Machine condition monitoring
Proximity Switches - Position verification (gates/ram)
HMI Interface - Operator command input & status display
Safety Interlocking Circuits
Emergency Stop Buttons - Immediate shutdown capability
Safety Gate Switches - Access door interlocks
Pull-Wire Switches - Conveyor safety shutdown
Safety Relays - Redundant fault monitoring
A thorough comprehension of the system's architecture forms the indispensable foundation for effective troubleshooting. The electrical control system in an industrial solid waste shredder integrates power distribution, logic processing, and sensory feedback into a cohesive operational unit. This integration facilitates the precise management of high-torque drives and complex material feed sequences. Understanding the distinct role of each major subsystem enables technicians to isolate malfunctions methodically rather than relying on speculative component replacement, a practice that often leads to extended downtime and unnecessary expenditure.
The Central Processing Unit: Programmable Logic Controllers and Drives
Programmable Logic Controllers function as the system's computational core, executing pre-programmed sequences to coordinate every operational phase. These units receive data from sensors and operator inputs, processing this information to control output devices such as motor starters and hydraulic valves. Adjacent to the PLC, variable frequency drives regulate the speed and torque of the main shredder motor, allowing for optimization based on material density and load. The reliable communication between the PLC and drives, often managed via the shredder's control panel, is critical for synchronized operation.
Power Distribution and Actuation Components
Electrical power is channeled through a network of protective and switching devices before reaching the motors. Main circuit breakers provide primary overcurrent protection for the entire system, while subordinate contactors function as heavy-duty relays to energize high-power circuits like the main rotor motor. Control relays manage lower-power auxiliary circuits for functions such as cooling fans or conveyor belts. Thermal overload protectors are embedded within these circuits to prevent motor windings from sustaining heat damage due to mechanical obstruction or excessive current draw.
Input Devices: Sensors and Human-Machine Interfaces
The control system's awareness of machine state is granted by an array of input devices. Temperature sensors monitor bearing and hydraulic fluid conditions, while vibration sensors can detect imbalances or mechanical wear within the cutting chamber. Proximity switches confirm the position of access doors or the hydraulic ram. The Human-Machine Interface presents system status to the operator and serves as the primary command input point, displaying parameters and fault codes that initiate the diagnostic process.
Safety and Interlocking Control Circuits
Independent safety circuits are engineered to provide fail-safe protection regardless of the primary control system's state. These dedicated loops typically include emergency stop buttons, mechanical safety gate switches, and pull-wire switches along the conveyor. A break in this circuit, designed with redundancy and monitored by safety relays, will trigger an immediate and unconditional shutdown of all hazardous motions, isolating power to actuators while maintaining illumination for diagnostics.
Essential Preparatory Actions and Safety Protocols
Safety Protocols & Diagnostic Tools
| Category | Key Items | Purpose/Function | Critical Verification Steps |
|---|---|---|---|
| Lockout-Tagout | Electrical disconnect locks, hydraulic/pneumatic isolation valves, personal tags | Isolate all energy sources to prevent unexpected machine actuation | Attempt start from local/remote controls after isolation |
| Diagnostic Tools | True-RMS multimeter, clamp-on ammeter, megohmmeter (insulation tester) | Precision measurement of voltage, current, resistance, insulation integrity | Calibrate tools before use; verify readings against known good sources |
| Documentation | Electrical schematics, technical manuals, fault code logs | Provide circuit roadmap and operational specifications | Confirm documentation is latest version matching machine serial number |
No diagnostic activity may commence before the rigorous application of safety protocols designed to isolate energy sources. Electrical maintenance on industrial equipment carries inherent risks of arc flash, electrocution, and unexpected machine actuation. A procedural and verified approach to energy isolation is the single most critical factor in preventing severe injury or fatality. This preparatory phase, though time-consuming, establishes a safe working environment and ensures that subsequent testing is performed on a predictably inert system, eliminating variables that could lead to misdiagnosis.
Execution of a Verified Lockout-Tagout Procedure
The Lockout-Tagout procedure mandates the systematic isolation and securing of all potential energy sources. Technicians must de-energize and lock the main electrical disconnect, isolate hydraulic pressure via shut-off valves and bleed residual pressure, and similarly secure pneumatic systems. Each applied lock must be accompanied by a tag identifying the individual who applied it, and only that individual may remove it. Verification of isolation is achieved by attempting to start the machine from the local and remote controls after ensuring no personnel are exposed to hazards.
Required Diagnostic Instrumentation and Documentation
Accurate diagnosis demands appropriate tools. A true-RMS digital multimeter is required for measuring voltage, resistance, and continuity with precision. A clamp-on ammeter allows for current measurement without breaking the circuit. An insulation resistance tester, or megohmmeter, is crucial for assessing the integrity of motor and cable insulation. These physical tools must be complemented by the most current versions of the machine's electrical schematic diagrams and the manufacturer's technical manual, which provide the circuit roadmaps and operational specifications.
Identification and Systematic Recording of Fault Symptoms
Effective troubleshooting begins with a meticulous gathering of symptomatic data. The technician must interview the operator to understand the exact circumstances preceding the failure, noting any unusual sounds, smells, or visual indicators. All alphanumeric fault codes displayed on the HMI must be recorded verbatim, as they provide a direct pointer to the subsystem involved. This documented evidence creates a baseline against which post-repair performance can be compared and helps identify intermittent issues that may not be present during the initial inspection.
Consultation of Electrical Schematics and Technical Manuals
The electrical schematic is the authoritative map of the control system, detailing every connection, component, and wire number. Cross-referencing observed symptoms with the schematic allows the technician to hypothesize potential fault locations. The technical manual provides vital context, including normal operating parameters, adjustment procedures, and specific testing points for components like the hardened steel shaft drive assembly. Attempting diagnosis without these documents is speculative and increases the risk of error.
Methodical Diagnostic Procedures for Common Electrical Faults
Common Fault Diagnosis Flowchart
Scenario 1: Complete Failure to Start
Check main power supply (breaker status, utility power)
Verify emergency stop circuit continuity
Test control power transformer outputs & master control relays
Scenario 2: Unplanned Stoppages
Check thermal overloads → Test motor insulation → Verify power
quality (voltage sags/phase loss)
Scenario 3: Abnormal Motor Operation
Check for single-phasing → Verify phase sequence → Diagnose
VFD parameter settings/feedback
Scenario 4: Input Signal Failures
Monitor PLC input status → Test sensor operation → Verify
HMI-PLC communication
Diagnosis should follow a logical progression from the most general and easily verifiable potential causes to more complex and subsystem-specific failures. This top-down methodology prevents the oversight of simple problems and organizes the troubleshooting effort. Technicians are advised to begin with power supply verification and safety circuit integrity before investigating motor drives, sensor networks, and finally, the central processor and its software. This structured approach is reflective of professional industrial maintenance standards, consistently applied by engineering teams with over fifteen years of field experience at firms like MSW Technology.
Scenario One: Complete Failure to Start
A total lack of response upon a start command typically indicates a failure in the power supply or the primary safety circuit. Investigation starts at the main service entry, checking for upstream breaker trips or utility power loss. The continuity of the emergency stop circuit must then be verified, as a single faulty e-stop button or broken wire will interrupt the control power path. Subsequent checks involve the control power transformer outputs and the condition of any master control relays whose closure is a prerequisite for enabling the operational logic.
Scenario Two: Unplanned Stoppages or Recurring Trips
Intermittent shutdowns often point to protection devices fulfilling their design function. Thermal overload relays trip in response to sustained overcurrent, which can stem from a dull cutting rotor, a jammed hopper, or a failing motor winding. Short-circuit faults cause instantaneous trips of circuit breakers or fuses and require insulation testing to locate. Voltage sags or phase loss from the mains supply can also cause protective devices in sensitive drives to fault, necessitating a log of power quality during operation.
Scenario Three: Abnormal Motor Operation
Motors running but exhibiting incorrect behavior require focused investigation. Single-phasing, where a motor runs on two phases instead of three, causes excessive noise, overheating, and loss of power; this is often due to a burnt contactor pole or a broken wire. Incorrect rotation direction results from a phase sequence error during reassembly. A motor that does not respond to speed commands from a VFD may have faulty feedback devices, incorrect parameter settings, or a malfunctioning drive output stage, requiring detailed drive diagnostics.
Scenario Four: Input Signal Failures and Logic Errors
Erratic machine behavior can originate from faulty input signals. A limit switch stuck in the "actuated" position may falsely indicate that a safety gate is open, preventing start-up. A degraded proximity sensor might intermittently fail to detect the hydraulic ram position, causing sequencing errors. Communication errors between the HMI and PLC can corrupt data display and input. Diagnosing these issues involves monitoring the real-time status of input points on the PLC and physically verifying each sensor's operation and alignment.
Testing and Remediation Techniques for Critical Electrical Components
Critical Component Testing Methods
| Component | Testing Procedure | Acceptance Criteria | Common Failure Indicators |
|---|---|---|---|
| Contactors/Relays | Test coil continuity/resistance; measure contact resistance (closed state); inspect for arcing/pitting | Coil resistance ±10% of spec; contact resistance < 1Ω | Open coil circuit; pitted/welded contacts; high contact resistance |
| VFDs | Review fault codes; test input/output voltages; verify parameter settings | No active faults; voltage output matches command; parameters align with specs | OC (Overcurrent), OV (Overvoltage), UV (Undervoltage) alarms; no output voltage |
| Proximity Sensors | Verify power supply; test output state with target present/absent; check alignment | Output switches reliably at specified sensing distance | No output change; intermittent switching; LED failure |
| Cables/Grounding | Insulation resistance test; terminal torque check; ground resistance measurement | Insulation > 10 MΩ; ground resistance < 5Ω; terminals to spec torque | Low insulation resistance; loose/corroded terminals; high ground resistance |
Once a fault is localized to a specific component or circuit segment, definitive confirmation through testing is required before replacement. The objective is to gather empirical evidence of failure, such as a resistance value outside specification or a missing output signal. This evidence-based approach justifies the repair action and helps differentiate between component failure and secondary symptoms caused by problems elsewhere in the system, such as a faulty power supply damaging a sensor.
Safe Testing of Contactors and Relay Coils and Contacts
With power locked out, the coil of a contactor or relay can be tested for continuity and resistance using a multimeter; an open circuit or a resistance value significantly different from a known-good unit indicates failure. The main power contacts must be inspected for signs of arcing, pitting, or welding. Contact resistance can be measured in the closed state; a high reading suggests erosion and increased heat generation. Auxiliary contacts used for interlocking should also be checked for proper operation, as their failure can disrupt control logic.
Diagnosing Variable Frequency Drive Alarm Codes and Resets
Modern VFDs provide detailed fault histories accessible via their keypad or connected HMI. Common alarms like "Overcurrent" (OC) may indicate mechanical jamming, motor insulation breakdown, or drive IGBT failure. "Overvoltage" (OV) alarms often point to regenerative energy from a decelerating high-inertia load without a functional braking resistor. After identifying and rectifying the root cause, a safe reset procedure involves clearing the fault memory and initiating a low-speed test run under careful observation before returning to full operational parameters.
Functional Validation of Proximity and Photoelectric Sensors
Discrete sensors are validated by observing their output state change in response to the target. For a proximity sensor, bringing the specified metal target within its sensing range should cause its output LED to illuminate and its signal to the PLC to change state, measurable with a multimeter on the output terminals. Photoelectric sensors require a clear beam path; alignment is checked, and the receiver's response to beam interruption is verified. Consistent failure to switch confirms sensor demise, while intermittent operation suggests loose wiring or power supply issues.
Inspecting Cable, Terminal, and Grounding System Integrity
Corrosion, vibration, and thermal cycling degrade electrical connections over time. A thorough inspection involves checking every terminal connection in the affected circuit for tightness and signs of oxidation. Cable insulation should be examined for cuts, abrasion, or brittleness. The integrity of the equipment grounding system is paramount for safety and noise immunity; ground connections must be physically robust and exhibit low resistance back to the facility's grounding electrode. This comprehensive inspection mirrors the preventative ethos required for complex systems like an e-waste shredder cooling system.
Post-Repair Verification Testing and Systematic Recommissioning
Post-Repair Verification & Recommissioning
Staged Power Restoration Process
Control Power Only
PLC/HMI
Verification
Main Power On
Motors Disconnected
No-Load Motor Run
Parameter
Monitoring
Controlled Load Test
Full System
Validation
Circuit Review: Point-to-point verification against schematics; terminal torque confirmation
Functional Simulation: Manual sensor actuation; PLC I/O status verification (no power)
Operational Checks: Motor rotation verification; pressure/temperature monitoring; no abnormal noise/vibration
The reinstatement of a repaired system necessitates a phased and monitored approach to confirm the fault is resolved and no new issues were introduced. A direct return to full production load risks repeated failure or collateral damage. The recommissioning process is designed to incrementally validate functionality, first in a static state, then under no load, and finally under controlled load. This graduated validation provides multiple opportunities to identify and correct residual problems before the machine is released for continuous operation.
Reinstallation of Repaired Components and Circuit Review
Following component replacement, all connections must be remade according to the schematic, with terminals tightened to the specified torque. Wire routing should be restored to avoid sharp edges or hot surfaces. A visual "point-to-point" review of the entire repaired circuit against the schematic is a crucial final check before re-energization. This step ensures that no wires were omitted or connected to incorrect terminals during the repair process, a simple error with potentially complex consequences.
Pre-Energization Functional Simulation Testing
With the system still locked out, simulated operational tests can be performed. This involves manually actuating limit switches and sensors to mimic machine sequences while observing the corresponding activation of contactors, relays, and solenoid valves. The status lights on the PLC's input and output modules provide a clear indication of signal flow. This dry-run test validates the control logic and wiring without any moving parts being powered, confirming that the repaired control system will execute its intended sequence correctly upon start-up.
Staged Power Restoration and No-Load Run Procedure
Power is restored in distinct stages to contain any potential faults. First, control power is activated alone, allowing verification of PLC boot-up, HMI communication, and healthy power supply voltages. Next, main power is restored but motors remain disconnected at the contactor. Finally, motors are enabled for a no-load run. During this phase, technicians monitor for unusual noises, verify correct rotation of all drives including ancillary systems like a discharge conveyor, and confirm that all operational parameters such as pressure and temperature remain within normal ranges.
Developing a Preventive Maintenance Regimen for Electrical Systems
Preventive Maintenance Regimen
Periodic Inspection Schedule
| Frequency | Key Maintenance Tasks | Target Components | Measurement/Verification |
|---|---|---|---|
| Daily | Visual inspection; cabinet cleanliness check; fault code review | Control panels, HMI, emergency stops | No visible damage; clean cabinets; zero active faults |
| Weekly | Terminal tightness check; cable routing inspection; sensor alignment | Power terminals, sensor wiring, contactors | Terminals to spec torque; no cable abrasion |
| Monthly | Thermographic survey; insulation resistance test (spot checks) | Motor connections, VFD cabinets, busbars | Temperature < 80°C; insulation > 10 MΩ |
| Quarterly | Complete insulation testing; contactor/relay inspection; cabinet environmental check | All motors, control relays, cabinet HVAC | Insulation > 5 MΩ; contact resistance < 1Ω; temp/humidity within specs |
Predictive Maintenance
Thermographic surveys for hot spot detection
Periodic insulation resistance monitoring
Vibration analysis for drive train health
Trend analysis of fault codes and operating parameters
Spare Parts Management
Stock critical components (PLC modules, VFDs, sensors)
Establish reliable supply agreements for long-lead items
Maintain centralized repair history documentation
Use failure data to optimize inventory levels
Environmental Control
Maintain cabinet temp/humidity (18-27°C, 30-60% RH)
Inspect/replace cabinet gaskets quarterly
Maintain positive pressure with filtered air
Protect against dust/moisture ingress
Proactive maintenance is the most effective strategy for maximizing shredder availability and lifecycle cost-efficiency. A well-structured preventive maintenance plan transitions from reactive repair to scheduled, condition-based intervention. This regimen is based on periodic inspection, measurement, and servicing of electrical components to address wear and environmental degradation before they precipitate a functional failure. The economic rationale for such a program is clear, often reducing total maintenance costs by significant margins while enhancing operational predictability, a benefit championed by established industry participants including MSW Technology.
Establishing a Periodic Electrical Inspection Checklist
A comprehensive checklist standardizes the inspection process, ensuring no critical item is overlooked. Scheduled tasks include the removal of dust and debris from control cabinets using low-pressure air or vacuum systems designed to protect sensitive electronics. Every power and control terminal connection should be checked for tightness with a calibrated torque wrench or tool. Cable insulation, especially in high-flex areas or near heat sources, requires examination for cracks or brittleness. Contactors and overload relays should be inspected for contact erosion and proper mechanical operation.
Predictive Maintenance Strategies for Critical Components
Advanced techniques move beyond schedule-based tasks to condition-based monitoring. Periodic thermographic surveys of electrical panels, motor connection boxes, and drive cabinets can reveal hot spots caused by loose connections or failing components long before they cause a shutdown. Regular insulation resistance testing on motors and feeders tracks the gradual decline of insulation quality, allowing for planned rewinding or replacement during scheduled downtime. Vibration analysis on the main drive train can predict bearing failures, linking electrical readiness to mechanical upkeep just as the RDF pre-shredder stage relies on downstream system health.
Environmental Management for Control Enclosures
The operational environment directly governs electrical component longevity. Control cabinets must be maintained within the temperature and humidity ranges specified for the installed electronics, often requiring properly sized air conditioners or heater strips. Sealing gaskets on cabinet doors must be intact to prevent the ingress of conductive dust, moisture, and corrosive agents common in waste processing facilities. Maintaining positive air pressure within sealed cabinets using filtered air blowers is a highly effective method for excluding contaminants, protecting sensitive PLCs and drive systems.
Spare Parts Management and Repair History Documentation
Strategic inventory management balances the cost of holding spares against the cost of extended downtime. Critical, long-lead-time items such as specialized PLC modules, VFDs, and custom sensors should be identified and stocked or sourced under a reliable supply agreement. Equally important is the meticulous documentation of every fault and repair in a centralized log. This historical data reveals patterns of failure, informs future design improvements, and provides critical context for technicians facing similar issues, building institutional knowledge essential for complex operations like those involving a scrap metal hammer mill shredder.